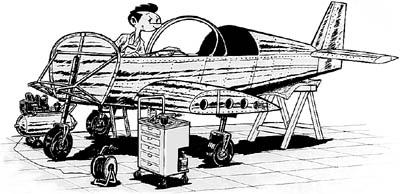
| Welcome to my
builder's log. I've divided this log into work related sections for easier reference. The
log is primarily for FAA record keeping purposes, but you may find my building sequence
and the problems I've encountered helpful. Also, the Tips &
Tricks section has a good number helpful hints that I've compiled. |
 |
Kit Unpacking &
Inventory
Total Hours: 10
| Date |
Hours |
Description |
| April 4, 1998 |
7 |
Unpacked and inventoried kit crate. Still have to inventory
small screws (hardware) type items. Found missing wheel "box" and a few other
missing items. Also found a damaged fuel tank (major dent in middle) and a slightly
damaged elevator skin (has what appears to be an indentation caused by shifting in the
crate, but doesn’t appear structural). Will send pictures to Zenith Air and find out
if either of these items need replacement. All other items appeared to be a good shape.
Definitely a considerable amount of work unpacking the crate. Highly recommend two people.
Had a friend help unpack and sort the larger items. This is definitely necessary to avoid
damaging the larger pieces of aluminum. Be prepared to spend 3 times as much time if
unpacking by just yourself. |
| April 5, 1998 |
3 |
Found all missing items except wheel related stuff (wheels,
hydraulics, etc.). Talked with ZAC (Zenith Aircraft Company) and found out that these
parts are shipped directly from Matco and should arrive within the next 2 weeks. Organized
stabilizer and elevator parts to prepare for building. |
| |
|
|
Rudder Build Log
Total Hours: 8
| Date |
Hours |
Description |
| June 2, 1998 |
2 |
Started rudder. Removed all labels and cleaned with
lacquer thinner. Applied corrosion protection and test fitted the parts. |
| June 4, 1998 |
4 |
Laid out majority of holes on spars and doublers.
Pre-drilled doubler holes and spar holes. Drilled 3 inner ribs holes. Clecoed and
partially de-burred. |
| June 8, 1998 |
2 |
Drilled out all pre-drilled holes on spar and ribs. Marked
and drilled top and bottom ribs. Took apart rudder skeleton and de-burred and re-apply
corrosion protection on touching parts. Riveted skeleton together. |
| |
|
|
Elevator Build Log
Total Hours: 46
| Date |
Hours |
Description |
| April 7, 1998 |
4 |
Marked elevator skin for riveting ribs, etc. Drilled spar
rib holes. Made H channel center support for elevator. Called Zenith about elevator skin
being 5mm to long on the top side. They suggested cutting the excess material and filing
to a smooth finish. I started practicing and found that a straight pair
of snips will work better than the right or left snips. |
| April 8, 1998 |
1 |
Finished marking rivet lines on ribs. Drilled the majority
of rivet holes for the ribs on the top and bottom of the elevator skin. |
| April 14, 1998 |
2 |
Drilled ribs (top, bottom, and front) for elevator. |
| April 29, 1998 |
1 |
Cut out hole for elevator control horn doubler. Trimmed
excess elevator skin and filed. Removed cleceos to prepare for riveting elevator bottom to
help with handling during control horn assembly. De-bur'd one rib and skin section. |
| May 2, 1998 |
6 |
De-bur'd remaining ribs and top and bottom skins. Applied
corrosion protection to ribs. Riveted the H control channel assembly. Riveted
the bottom
skin to the bottom ribs. Drilled holes for horn doubler and top control horn. Installed
mini-support brace for horn doubler. Drilled and Cleceo'd piano hinge. Found that the
small metric ruler I'd been using for marking was also a great way to provide good
separation of the piano hinge and elevator foreskin. Drilled and Cleceo'd all remaining
holes on the H control channel (had been waiting to see how the control horns were going
to affect rivet layout). |
| May 3, 1998 |
3 |
Cut out the BIG-U underneath the H channel on the Elevator
Skin. Definitely the scariest cut to date. Downloaded the stabilizer instructions from ZAC.
Made 2 L cuts into the stabilizer fuselage support bracket. |
| May 4, 1998 |
4 |
Drilled piano hinge for elevator trim tab w/ #40 bit.
Placed piano hinge over elevator and trim tab and re-drilled with #30 bit. Cleceo'd. Had
to be very careful on this to make sure the parts didn't move around, but by pre-drilling
the piano hinge, it help keep everything lined up and edge distances within check. Take a
look at the photo gallery for a picture of the piano hinge and drill press. I used a metal
piece as a brace which kept the drill holes extremely precise.
Cut out hole for trim tab servo.
Drilled holes for trim tab servo and cleceo'd. Cut out oval hole to allow push rod
full travel. Cut push rod to size. Drill 1/8" hole in elevator trim tab. Installed
push rods into elevator trim tab servo and elevator trim tab. |
| May 6, 1998 |
6 |
Finished Control Horns for Elevator. Cut out L support
brackets and drilled to elevator skin. Just need to make patch for elevator trim servo,
applied zinc chromate to some interior surfaces, verify proper travel in elevator trim,
and rivet top side. Always seems like things should go quicker, but all the little details
take up a lot of time (marking, pre-drilling - if necessary, clamping, etc.) |
| May 9, 1998 |
9 |
De-bur'd holes as necessary. Un-celeco'd structure. Prep'd
the surface to apply Zinc Chromate. |
| May 10, 1998 |
10 |
Brushed Zinc Chromate onto inside of elevator surfaces.
Finish added a couple extra rivet holes to maintain 10mm edge distance on rib flanges.
Made cut-out cover for elevator trim servo box. Riveted top side and elevator hinge. Yeah!
Elevator is finish! Have left control holes un-riveted in case they need modification. |
| |
|
|
Stabilizer Build Log
Total Hours: 56
| Date |
Hours |
Description |
| May 13, 1998 |
4 |
Mark and pre-drilled the spar doublers for the stabilizer.
Clamped the doublers to the spars and pre-drilled the spars. All pre-drilling was done
with A4/#30 size. Will later go back and re-drill with A5/#20. Just don't have enough A5
cleceos to hold the spar doublers to the spar properly. Note, was only able to pre-drill 3
doublers, have one more to go. |
| May 16, 1998 |
8 |
Marked the rib centerlines that meet with the stab spar.
Made custom L angles to keep the ribs 90 degrees to the spar. Clamped the ribs and spars
together and drilled rib holes. Cleceo'd assembly and tested for squareness (rib 90
degrees to the spar and no twist up & down on the rib inside surface area). |
| May 17, 1998 |
3 |
Finished drilling the two middle rib holes on the
stabilizer back side. Made L angles for outer stabilizer ribs. Pre-drilled outer stab ribs
with #40 bit. Clamped L angle and Rib to ensure squareness. Re-drilled with #30 bit and
clecoed. |
| May 18, 1998 |
5 |
Finished Rear Spar Attachment cut out. Pre-Drilled
Rear Spar Attachment. Pre-Drilled L posts fuse attachments. Clamped and pre-drilled to
stabilizer (both parts RSA and L-posts). Drilled all A4 holes that needed to be A5 per
plans. |
| May 20, 1998 |
8 |
De-bured all holes on stabilizer skeleton assembly. Applied
corrosion protection to all skeleton parts. Hand riveted skeleton assembly. Applied
corrosion protection to inside of stabilizer skin. |
| May 22, 1998 |
4 |
Pre-drilled lower stab skin (just rear spar area).
Determined and marked center lines for bottom side of rear spar, front spar, inside ribs,
& outside ribs. Marked rivet holes for rear spar. Marked rivet holes for inside ribs. |
| May 24, 1998 |
8 |
Finished marking and pre-drilling all areas of lower
stabilizer skin. This included drilling for the fiberglass tips (just on the lower skin).
Mounted/clamped skin to stabilizer skeleton and drilled skin / skeleton with #30 bit.
Clecoed every hole to provide a smooth skin surface. Removed clecoes and de-bured skin and
skeleton. Clecoed half the holes on the skin to the skeleton and riveted. Removed
remaining clecoes and finished riveting bottom skin. |
| May 25, 1998 |
8 |
Marked and pre-drilled top stabilizer skin. Strapped
skin and drilled skin to spars / ribs and clecoed. |
| May 30, 1998 |
5 |
Riveted top stabilizer skin and checked for level/square
without problems. Drilled elevator hinge to stabilizer and clecoed. |
| June 1, 1998 |
3 |
Used a fellow builders ribs as spacers to enlarge
stabilizer fiberglass ends. After installation found that the end tips of stabilizer ends
are off imposed centerline by 4mm. Left one is 4mm down and right one is 4mm up for a
large 8mm total difference. Talked with Nick about this and found that it might be a
problem in their molds, but was basically told this was cosmetic and not to worry. Ordered
new ones. If new ones are also off then at least a can match a set of them that point down
or up. |
| |
|
|
Outboard Wings (601HDS) Build Log
Total Hours: 245
| Date |
Hours |
Description |
| June 22, 1998 |
4 |
Outboard Wings - Marked centerline on all outboard wing
ribs. Clamped spar & 3 primary front ribs and drilled using #40 bit on both left and
right wing. Clecoed 3 front ribs on both wings. Checked for "square". |
| June 24, 1998 |
4 |
Installed Nose Rib 7A on both spars (marked, pre-drilled,
& clecoed). Installed U channel fuel tank support (marked, pre-drilled, &
clecoed). Put both spars on table for easier access. Found slight bow in wing spars.
Waiting for okay back from ZAC and Newsgroup. |
| June 27, 1998 |
8 |
Installed rear ribs on left wing spar. Finished the other
side of the second U channel required to buffer the LE Fuel Tanks from the main spar.
Assembly left wing spar with both front and rear ribs. Checked for alignment and 90
degrees with the top and side of the main spar. Verified that all ribs wouldn't cause any
skinning problems by being oversized/undersized or placed too high/low on the spar. Still
need to make the L angle for the spar end rib. Then this wing will be ready to
disassembly, deburing, and skinning. |
| July 15, 1998 |
4 |
Doubled checked all rivet holes on wing skeleton and
made proper size per plans / instructions on left wing. Debured left wing skeleton and
applied corrosion protection. Riveted left wing skeleton together and tightened AN3 bolts
to specification (20 in/lbs.) |
| July 16, 1998 |
4 |
Doubled checked all rivet holes on
wing skeleton and made proper size per plans / instructions on right wing. Deburred right
wing skeleton and applied corrosion protection. Riveted right wing skeleton together and
tightened AN3 bolts to specification (20 in/lbs.) |
| July 20, 1998 |
8 |
Marked and pre-drilled rear zee for both left and right
wings. Clamped to respectively wings and drilled for A5 rivets. Debured rear zee. Checked
that with rear zee clecoed that all back ribs are in parallel (perpendicular to the main
spar).
Made 40mm pitch template for upper wing skin and main spar holes.
Pre-drilled both left and right upper wing skins for the holes on the main spar
intersection. Clamped right upper skin to right spar ensuring that spar was true (no
bends) and drilled for A4 rivets. Still have to go back and make funnel holes to allow
rivets to be flush with skin. |
| July 21, 1998 |
3 |
Clamped left upper skin to left spar ensuring that spar was
true and drilled for A4 rivets. |
| July 25, 1998 |
5 |
Rigged table to ensure that wings would remain true per ZAC
instructions. Drilled right wing's upper skin and rear rib holes. Pre-drilled rear zee top
holes. Clecoed assembly and checked for squareness. |
| July 26, 1998 |
4 |
Temporary clamped right wing's end rib in
place and mark top skin cut line. Marked top skin / spar extrusion baggage locker cut /
reference line. Removed clecoes from right wing. Corrosion protected rear zee and riveted
all ribs intersections with rear zee except I/B and O/B ribs. Move left wing on rigged
table to drill top skin / back ribs. |
| July 27, 1998 |
5 |
Took left wing skin and marked baggage locker cut out. Cut
out baggage locker opening in wing skin using a router. Finished setting up right wing on
table. Drilled right wing's ribs / skin intersection. Clecoed. |
| August 22, 1998 |
0 |
Order special L angle for end ribs on outboard HDS
wings. Wasn't able to mount the standard L angle to the spar extrusions and maintain
proper edge distance. Special L angles ordered from Zenith will have one flange at 9mm
(std. size) and second flange at 18mm. Cost for 4 feet was approx. $22 with shipping. |
| October 19, 1998 |
3 |
Cut out baggage locker on right wing. Temporary
clamped right wing end rib and marked curve cut of upper skin to match end rib. Cut right
wing upper skin for end rib. Attempted to install modify L angle ordered from ZAC on
August 22. |
| January 19, 1999 |
2 |
L Angle's used as pseudo ribs in HDS
wing. Un-celceod right wing skin. Cut down L-Angles so that an inch or so remained beyond
the top wing skin edges. Marked center lines on L-Angles. Used scrap 2x2 wood as brace and
drill holes into L-Angles using pre-drilled wing skin holes. |
| January 20, 1999 |
4 |
Cut Piano Hinge for Baggage Locker Door. Reversed
Hinge. Re-cut. Drilled for Hinge. Marked door and skins and drilled pilot holes in wing
skins. Drill full size DZUS fastener holes in locker skins. |
| January 27, 1999 |
4 |
Recessed top skin spar holes on right wing using
MicroStop counter bore drill bit. Removed right wing top skin and deburred holes on skin
and skeleton. Cleaned right wing top skin and applied Zinc Chromate from can on bottom
side for corrosion protection. Re-applied on spar sections that had be
worn due to
workshop building friction and such. |
| January 29, 1999 |
8 |
Riveted right wing top skin. All tack rivets fit well
except for one that needed to be enlarged from A4 to A5. Bent L - angles to match top wing
skins curve. Didn't rivet though. |
| January 30, 1999 |
8 |
Turned wing upside down and supported with
suggested 159mm and 80mm shims. Verified wing was true within acceptable tolerances (not
perfect, but good) by taking a level and making sure that the ribs were level and that the
main spar had a 2.8 degree slope and the rear-zee had a 2.6/2.7 rear slope. The actual
degree measurements are 2.76 degrees for main spar angle and 2.64 for rear-zee angle, but
my digital level only measures to one decimal place. Drilled the ribs and spar for the
right wing bottom skin. Everything looked good, went ahead and used the MicroStop for the
tack rivets along the spar. Turned wing right side up and found that everything looked
good, but I'll need to re-crimp the last L angle for the top skin. It appears to be
pulling the skin down. |
| February 1-6, 1999 |
12 |
De-burred right wing bottom skin. Visually added extra
crimps to top skin on right wing to improve curve. Drilled majority of holes for end ribs
on the left and right wings. Marked the left wing for curve of the end rib. Cut with
4" straight scissor shears and then smoothed up with a surform and file. Looked
great. Finally getting a handle on cutting with shears. Just takes practice. Would
recommend others attend a class for a day and practice at least for 4 hours before cutting
their expensive kit aluminum. Put left wing on table. Re-installed clecos and drilled tack
rivets on top skin. Installed baggage locker springs on left wing top skin. De-burred top
wing's left skin. |
| February 7, 1999 |
3 |
Finish cutting and filing L angles for left wing top skin. De-bur'd
left wing top skin and cleaned with |
| February 8, 1999 |
4 |
Drilled remaining wing rear rib holes to run wire for strobe/nav
light. Installed grommets. Drilled holes in rear zee of left wing for plastic wire mounts.
This was needed to ensure that the wire wouldn't rest/rub on the L angles and eventually
cut them. |
| February 8 - March 10, 1999 |
24 |
Was extremely bad about keeping the details of work done. Hours are
approximated. Did everything necessary to get the right wing ready for attaching the
Side
note: Last month was extremely busy in home, business, etc. Still waiting on fuel
probes. Got fuel gauges about a week ago and they tested fine. |
| March 12-14, 1999 |
20 |
Drilled and clecoed left wing for |
| July 1-21, 1999 |
40 |
I know this is large area of time.
Unfortunately our ISP hadn't converted over to FrontPage 2000 Server
Extensions and we were having a hard time updating the website. Here's a
summary of the work done this month:
Install nose skin on left HDS wing. Found that marking
lines on the top and bottom wing skins and transferring them to the skin
was the best way to mark and pre-drill for the nose ribs. Also, it will
help a look to create an access hole between the last two ribs (outboard
side). This rib is impossible to adjust when drilling if you're
already closed up the top and bottom skins.
Corrosion protected the nose skin. Trimmed the top and
bottom excess. Corrosion protected the area where the top and bottom of
the nose skin meet the top and bottom wing skins.
Applied cork to the fuel tank. Used 3M Heavy Duty Spray
Adhesive, #90. Slightly scratched the surface before applying. During the
glue's setup time, used one or two 2x4's and clamps to hold the cork
firmly to the tank and to help with the round edges. Picked up cork at a
local Michael's. Suggest getting wide long rolls if possible. Easier to
trim than to put on multiple pieces. The cork I used required two layers
and was about an 1/16" to 1/8" thick.
Drilled the drain hole and filler cap hole for the fuel
tank. Found that putting some lipstick on the drain hole is a great way to
mark the hole position. Just keep in mind that as the top skin compresses
the cork, the hole may move slightly. Came up with a neat idea for the
filler hole. Took a 2 1/2" hole saw, laid it on a piece of 12" x
12" construction paper. Marked the outline of the 2 1/2" hole.
Cut out with an exacta knife. Laid paper on the fuel tank while install in
wing without the nose skin on. Punch holes in paper that matched up with
rivet holes. Clecoed paper. Made sure hole was centered around filler
neck. Un-clecoed the paper and moved it to the nose skin. Clecoed used the
same matching holes on the nose skin. Drilled out filler neck hole. Only
done this on the first wing, but it came out great. Hope to have some
pictures on the second wing. Digital camera is in the shop for repair.
|
| July 22-25, 1999 |
14 |
Deburred all necessary holes. Riveted top
side of leading edge nose skin on left wing. Fitted end rib and fiberglass
tip. Trimmed skin. This took a surprising long time. Hard to get a pen in
to mark this area. Had to trim and re-trim many times. Drilled holes and
made wire cut out for strobe/nav light in fiberglass tip for left wing.
Here I found that cutting a laying the strobe/nav light on a piece of
paper and cutting the paper to match the shape, then taking the paper and
laying it up on the fiberglass tip providing good visual postioning.
Drilled wing skins for end rib and fiberglass tip. Debured holes and corrosion
protected the end rib. Riveted the end rib and L angle. Tested strobe/nav
light using wiring through the entire wing. Will most likely mount the
power box for the stobe/nav light at the outer edge on the center wing
section. |
| July 26-Aug 6, 1999 |
50 |
This is kind of a cop-out on the building
log, but since everything was basically just duplicating the same process
as the left wing, I didn't record each step of the complete the leading
edge of the right wing. The only part that was kind of a pain is that
Zenith's supplied Nose Rib 7A was slighter larger than specified in the
planes which caused the need to shim 1 to 2mm on the affected nose ribs.
Also, on both wings the last real rib required shimming along the top
curvation which is too narrow. Since this has happen to another builder at
the same location and my measurements match the plans, and there isn't a
gap at the top or bottom spar, I have to assume that ZAC's form block is
off slightly on this rib. Since the shimming is less than 3mm (acceptable
standard in building's guide) it wasn't worth replacing, just takes a
couple of hours to properly shim up.
Was a great joy to see the strobe light flash on the
right wing. Also, nice to see both wings sitting in the house waiting for
the rest of the plane. Definitely a motivates one to finish. |
| |
|
|
Center Wing Building Log
Total Hours: 30
| Date |
Hours |
Description |
| Aug. 7-Aug 15, 1999 |
30 |
Cut the necessary 12 L angles for the inboard
center section ribs. Marked ribs for L angles. Clamped and drilled. Corrosion
protected these ribs and L angles. Riveted. Nothing terribly difficult
about this section. It was extremely time consuming though.
Made miter saw jig to cut down gear slides per plans.
Cut down slides. Jig wasn't aligned properly during first cut and have
gear slide on order to replace. Sanded smooth cut edges.
Marked one of the gear ribs for the gear slides, L
angles, and doublers. Pre-drilled holes and backed drilled L the gear
slides, L angles, and doublers. Sandwiched the remaining ribs (one by one)
and transferred holes for the original pre-drilled holes over. Installed L
angles and doublers on all gear ribs. Installed gear slides on mirror'd
image of first rib. Still have to complete gear rib slides on the
remaining two ribs.
Installed aileron bell crank supports and doubler on one
gear rib. Still have other one to finish. |
| |
|
|
| |
|
|
|
